This engaging tutorial will teach you how to draw a karatist in merely eight easy steps! The best part? You only need standard drawing materials, techniques and a little over half an hour to get the job the done. Are you ready to get started?
What is a karatist, you might ask? Well, people who practice the martial art known as karate are commonly called karatist.
Whether they’re beginners or experienced practitionaers, they are awared this title once they exhibit physical prowess, mental discipline, and other karate-related characteristics.
If you have completed our Karate GI and black belt tutorial, you’re in for a treat with this one! If not, be sure to check those out whenever you have the chance for some key insights on how to master this drawing.
For now, grab ahold of your drawing materials and study the outline provided below and let’s get right into it!
What You Will Need
- A4 sheet of paper
- Pencils (HB, 2h and 3b)
- An eraser
- Colored pencils or markers
- 35-40 minutes
How to Draw a Karatist
The trick to pulling off this drawing is making sure you have the correct drawings tools at your disposal. You can use any A4 piece of paper for a karatist drawing.
Since they are lightweight and easy to erase in the event that you make a mistake, HB pencils are an excellent choice for outlining the karatist on paper.
Towards the end, when you’re going over each line and shape to darken the image of your karatist, 2h and 3b will definitely come in handy.
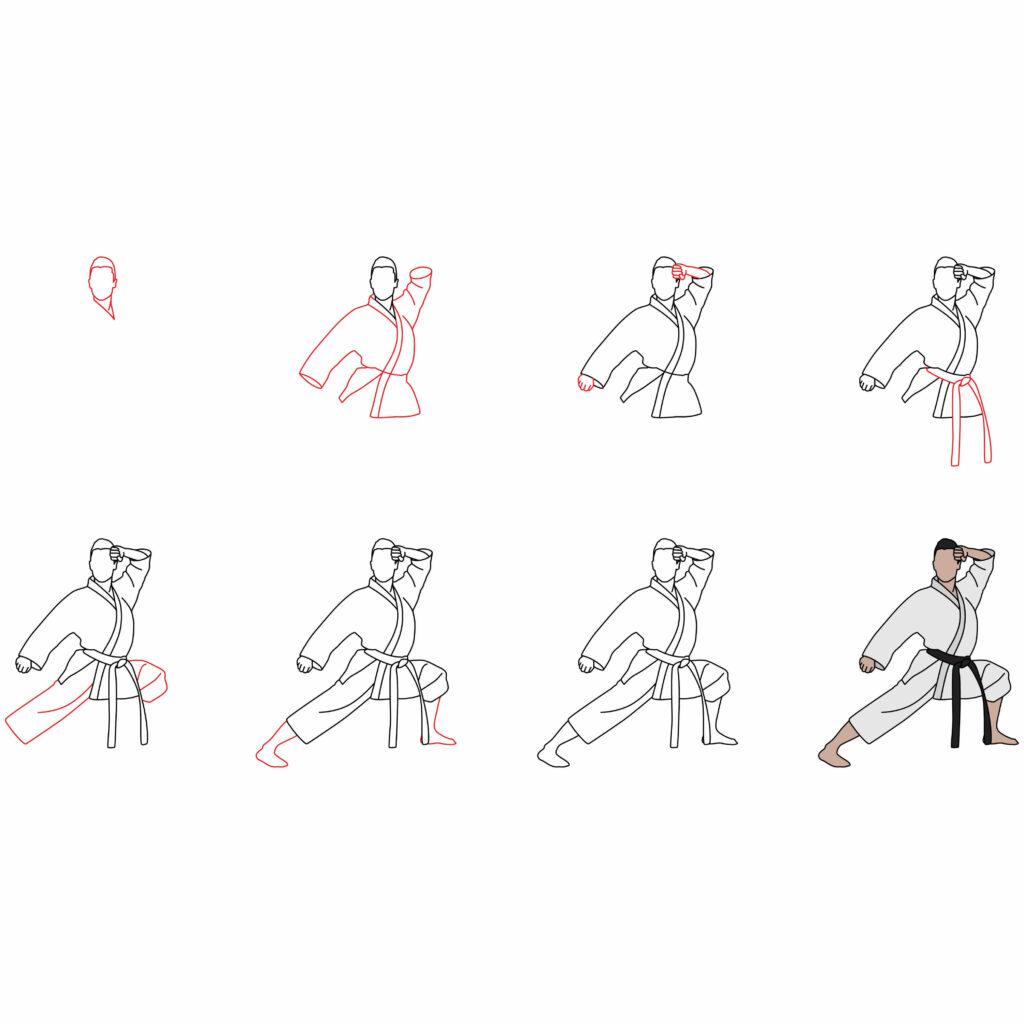
Step 1: Draw the Head
First things first, flip your drawing paper in a preferred orientation. A portrait orientation might make your karatist appear larger, while a landscape orientation will give you more room to add the background elements later on.
Start by drawing the head along the top part of your page. Draw a large oval for the shape of the head. Avoid making the lines of the oval too smooth, as a few waves and slight curves will make it look more realistic.
Draw a square attached to the bottom part of the oval for the neck, and include a triangular shape pointed to the right for the collar of the gi. Wherever you may feel stuck or confused, remember to take a peek at the image below for a guide.
- Draw an oval shape for the head
- Ensure the lines of the oval are wavy
- Draw a square and triangle for the neck and collar

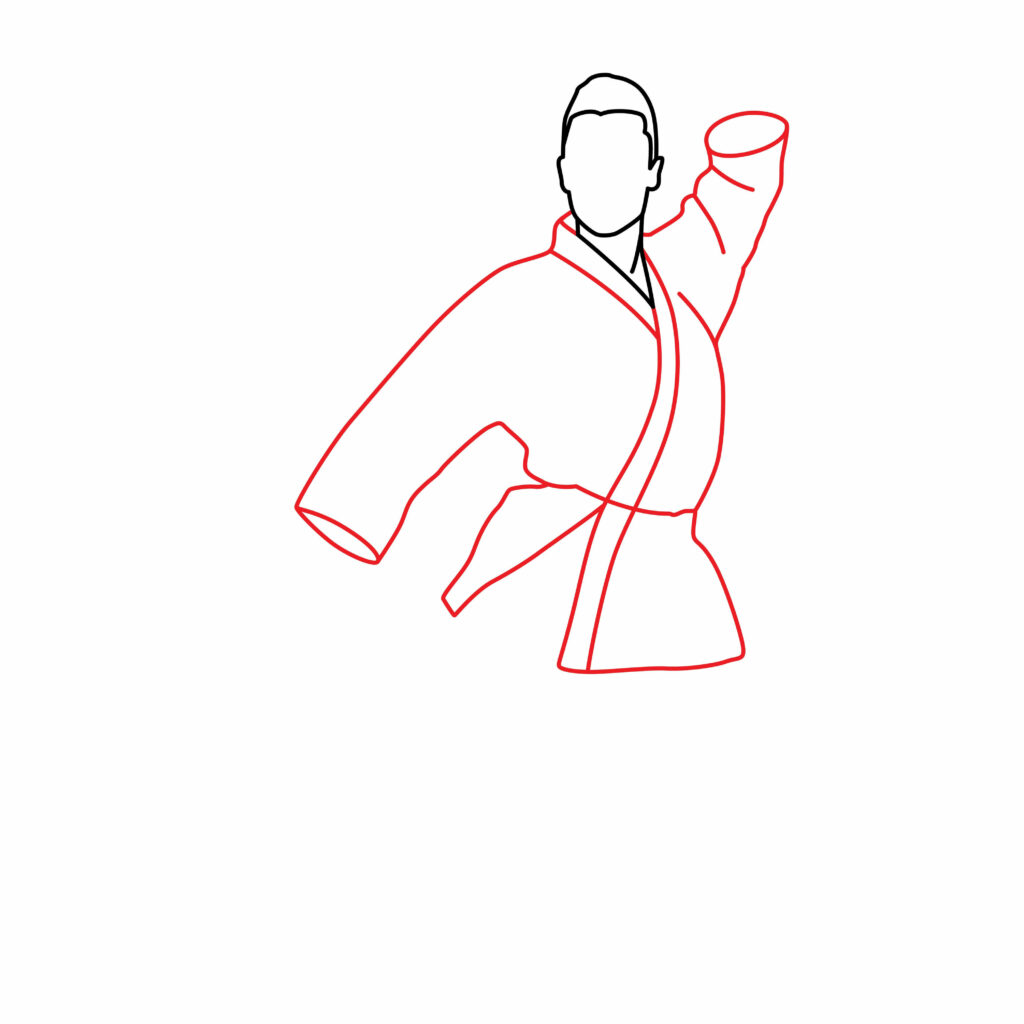
Step 2: Draw the Upper Part of the GI
Now that the head is complete, it’s time to move on to the torso region. In this step, we’re going to add the upper part of the karatist’s uniform, known as a karate gi.
Unlike our detailed karate gi drawing tutorial, the upper part is actively in motion in this drawing, meaning the arms are outstreched and posed in a variation of a karate stance called “the back stance”.
Start by drawing the collar and center tie of the gi. Follow the image below closely for a guide on how to do this. Once you are finished, draw the arms. Remember to stretch the lines extending from the collar to resemble shoulders.
Complete the step by adding the necessary creases and folds just like the ones found in the image below. Take your time and make sure you’re happy with the results before continuing on with the next step.
- Use a combination of diagonal lines to add the collar of the gi
- Draw the shoulders and arms using a series of wavy and diagonal lines
- Follow the image closely for a guide on the dimensions and proportions
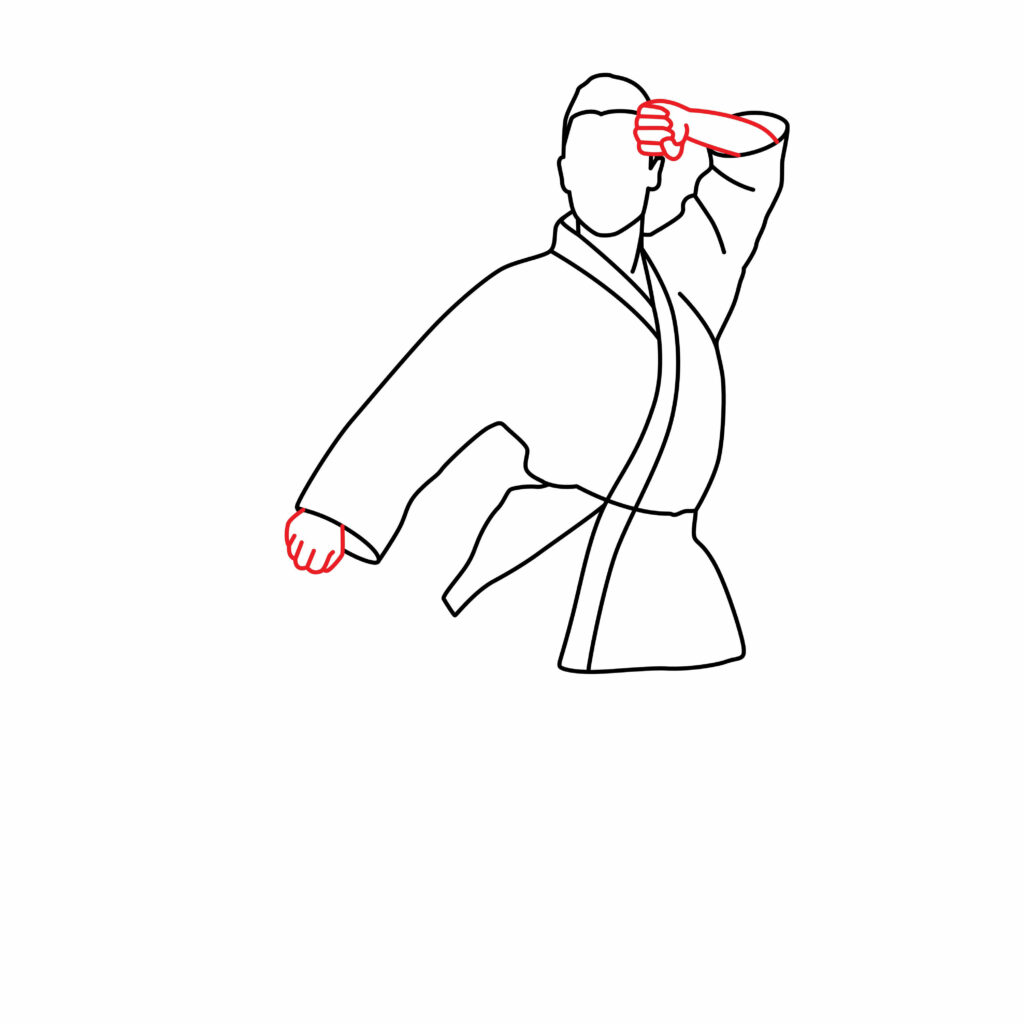
Step 3: Draw the Hands
We’re about halfway through the tutorial, so let’s keep up the pace and add this crucial step onto your sketch! As aforementioned, this karatist is actively in a back stance variation which means their fists are clenched.
Complete this step by first drawing a small oval shape extending from the left sleeve. Next, add a few lines over the shape to separate each finger and create the knuckles.
Then, you’re going to do the same thing for the sleeve on the right, however this time, you’re going to draw a forearm first. Draw a narrow horizontal rectangle extending from the cuff of the sleeve to resemble a forearm, and you’re good to go!
- Create hands by extending lines from the GI sleeves.
- Shape fingers with curved lines for a powerful and ready stance.
- These hands are like the karate master gearing up for some high-energy moves! Keep those lines smooth and enjoy the process.
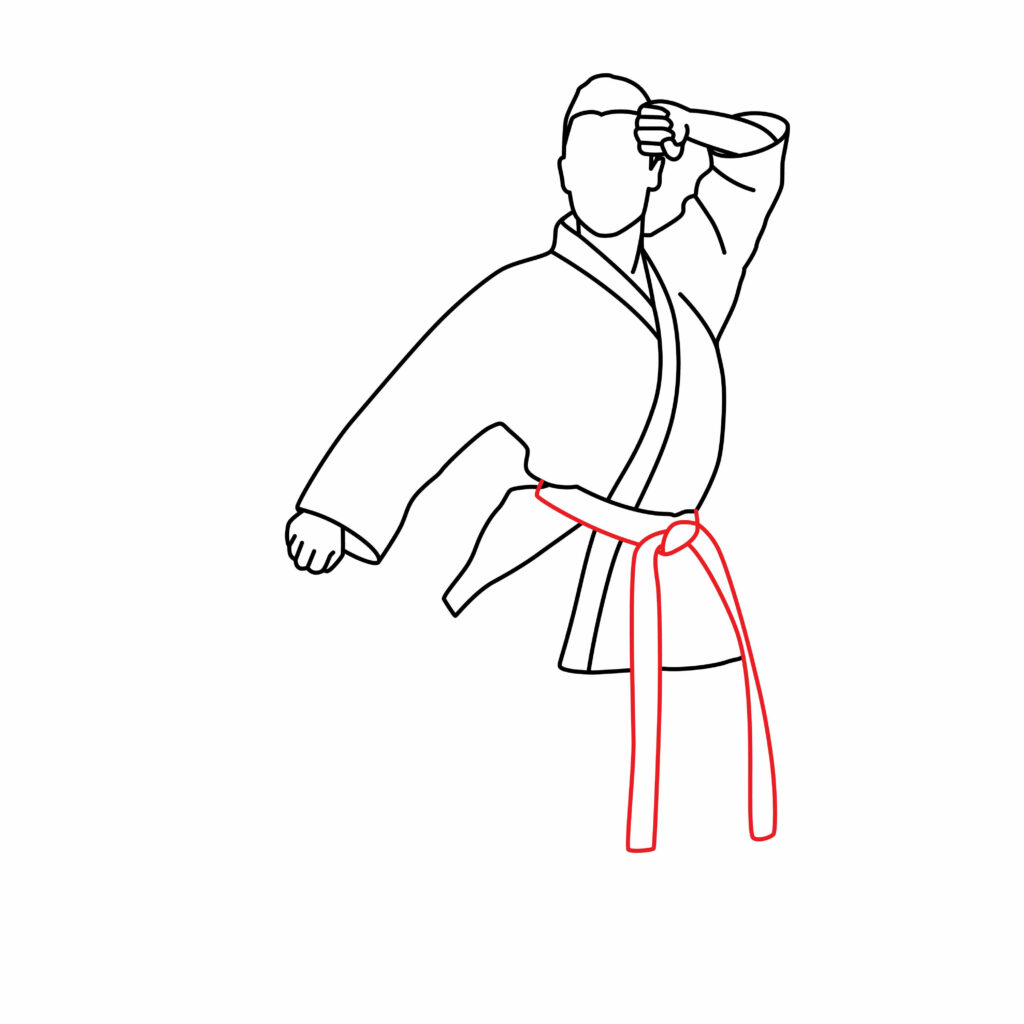
Step 4: Draw the Black Belt
Let’s make our karate master even cooler by adding a super special black belt! Find the waist area and use curved lines to draw this awesome belt. Make sure it’s tied well – that’s how everyone knows our karate master is a true expert in karate.
Think of the black belt as a superhero badge our karate master proudly wears. Take your time drawing those lines, making sure the belt looks perfectly tied and ready for some karate black belt adventures. With each stroke, you’re giving your character that extra touch of karate awesomeness.
- Draw the black belt in the waist area with cool curved lines.
- Make sure the belt looks super secure, showing everyone our karate master is an expert.
- The black belt is like a superhero badge, adding extra karate coolness to your character. Keep those lines smooth and have fun.
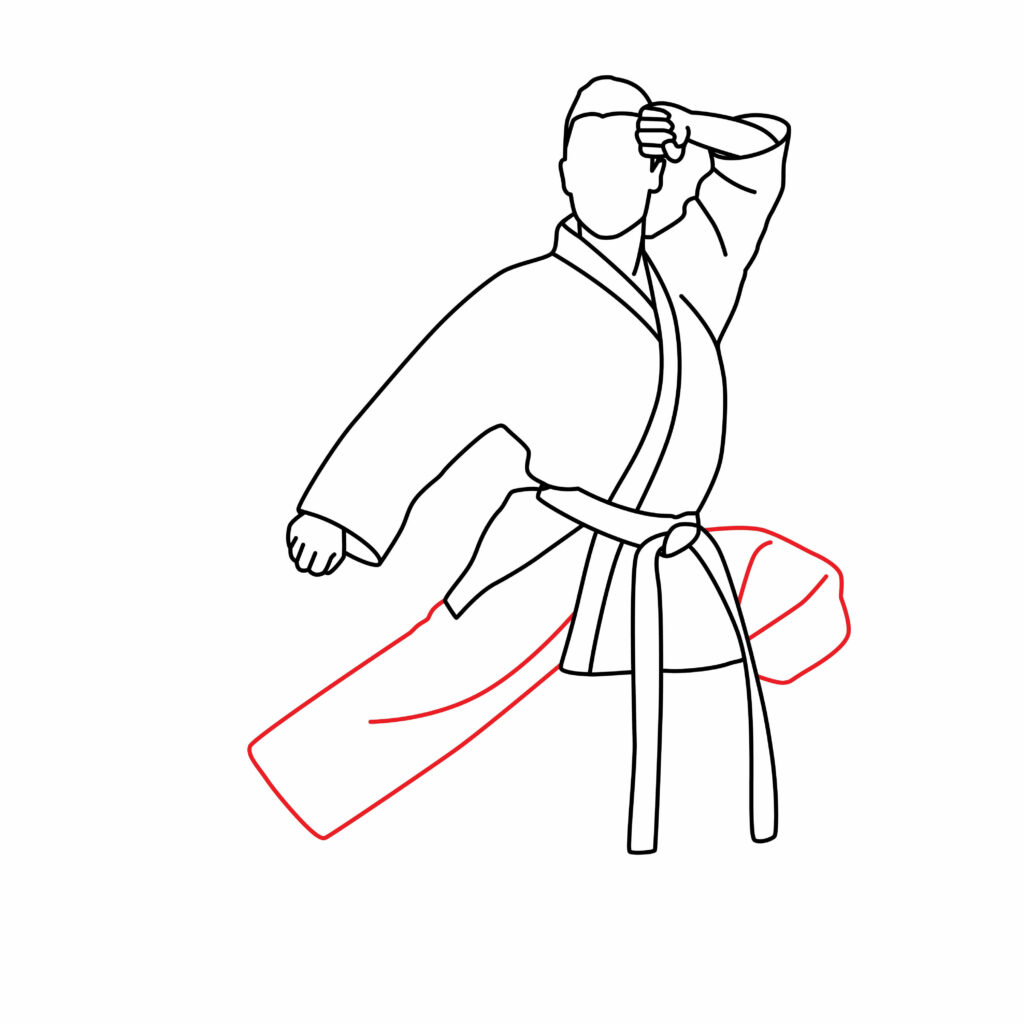
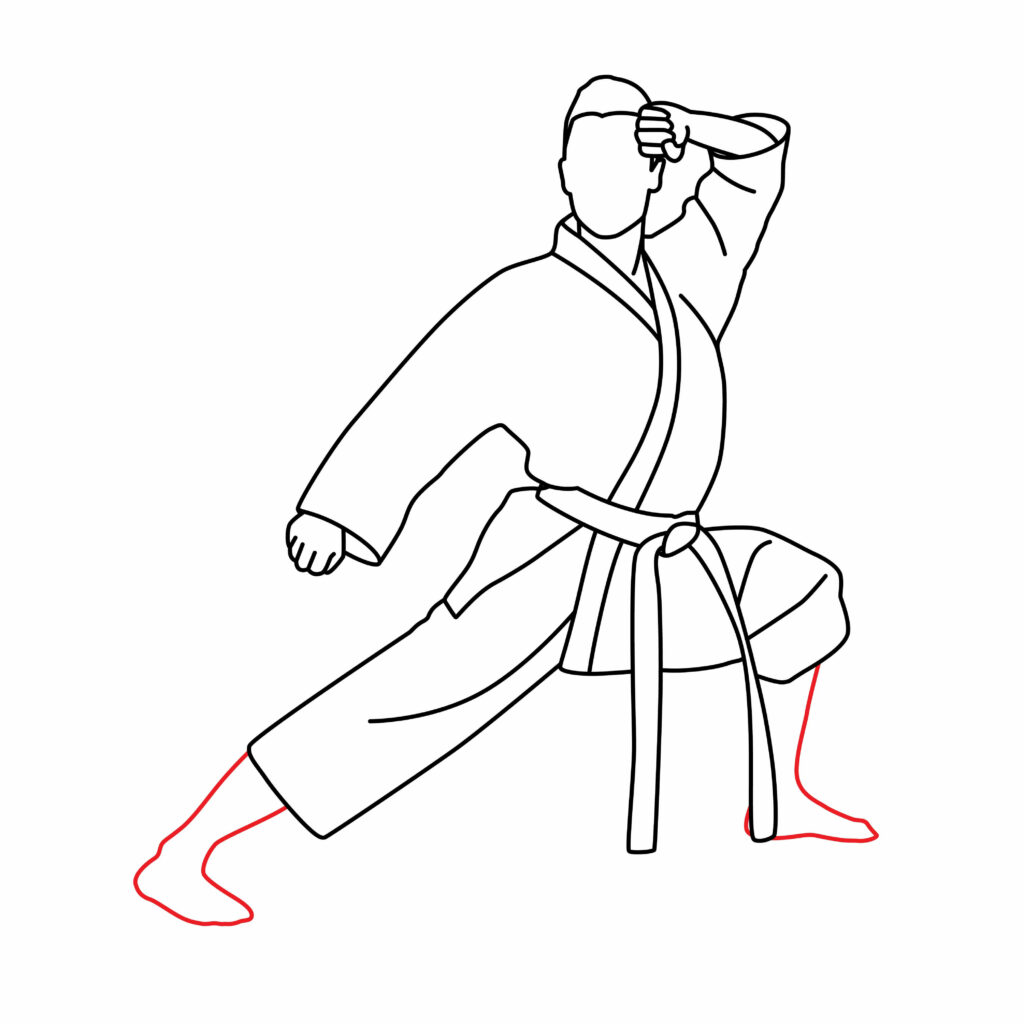
Step 5: Draw the Pants
Step 6: Draw the Legs
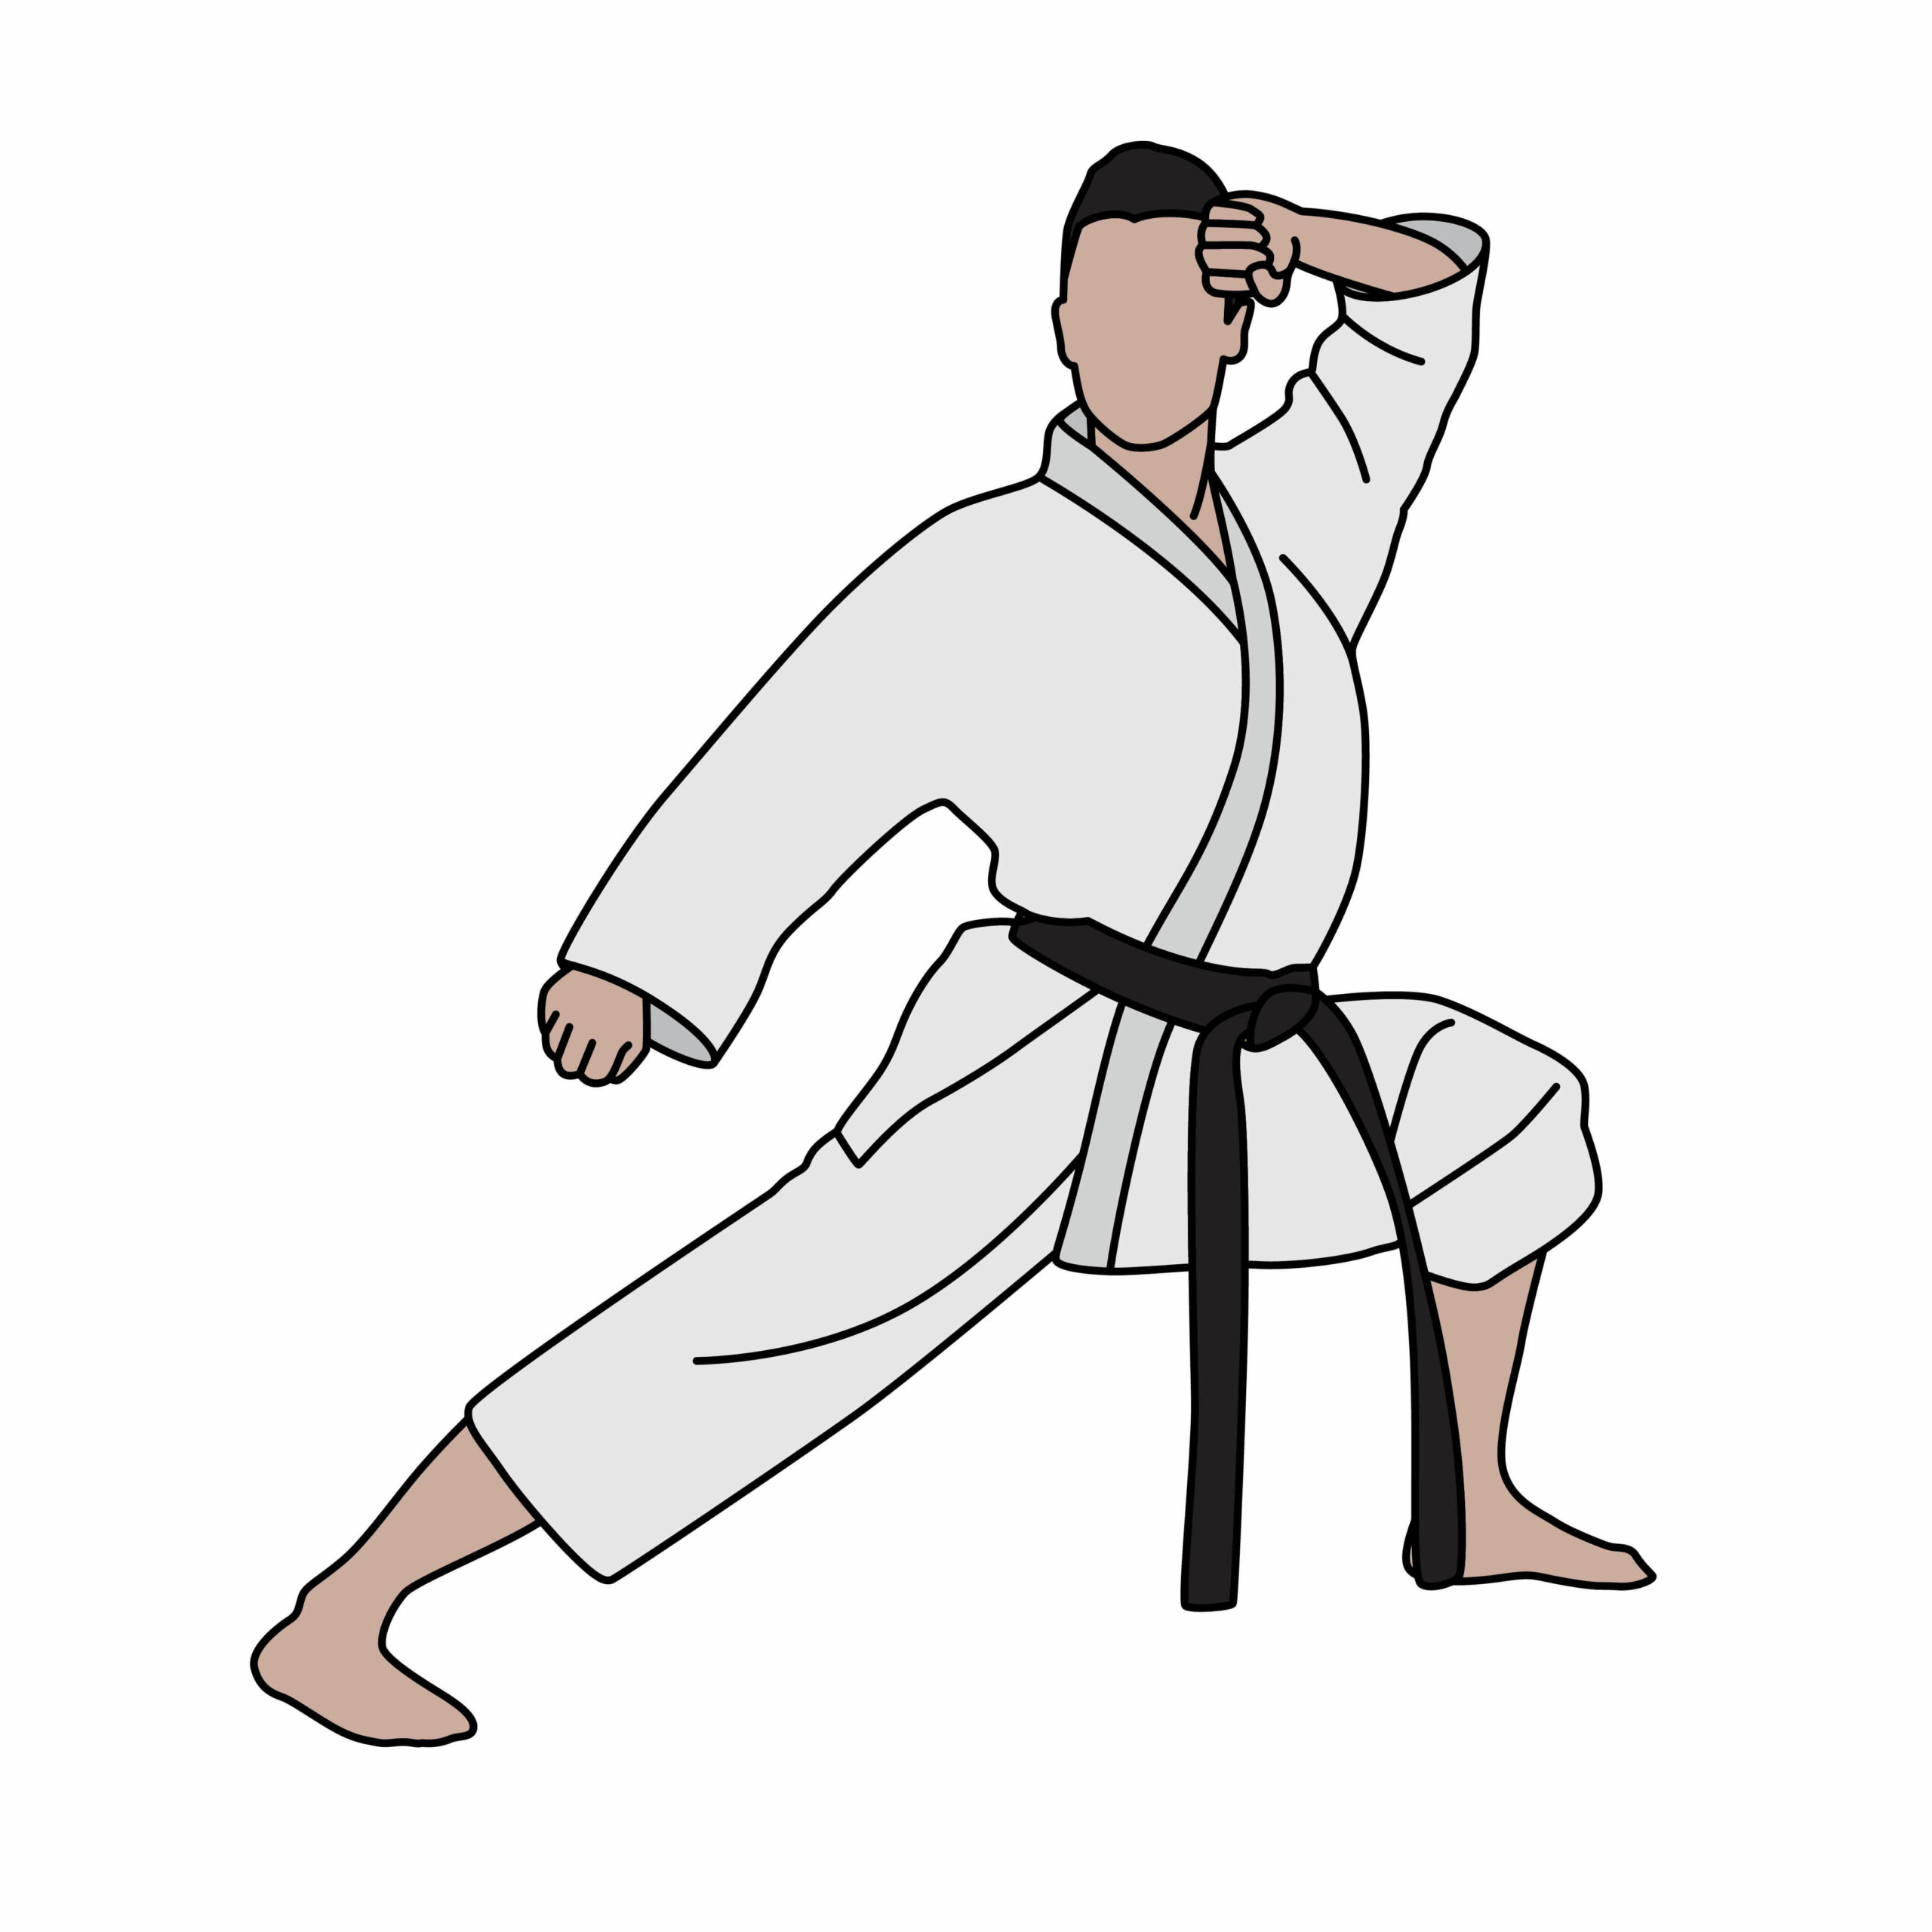
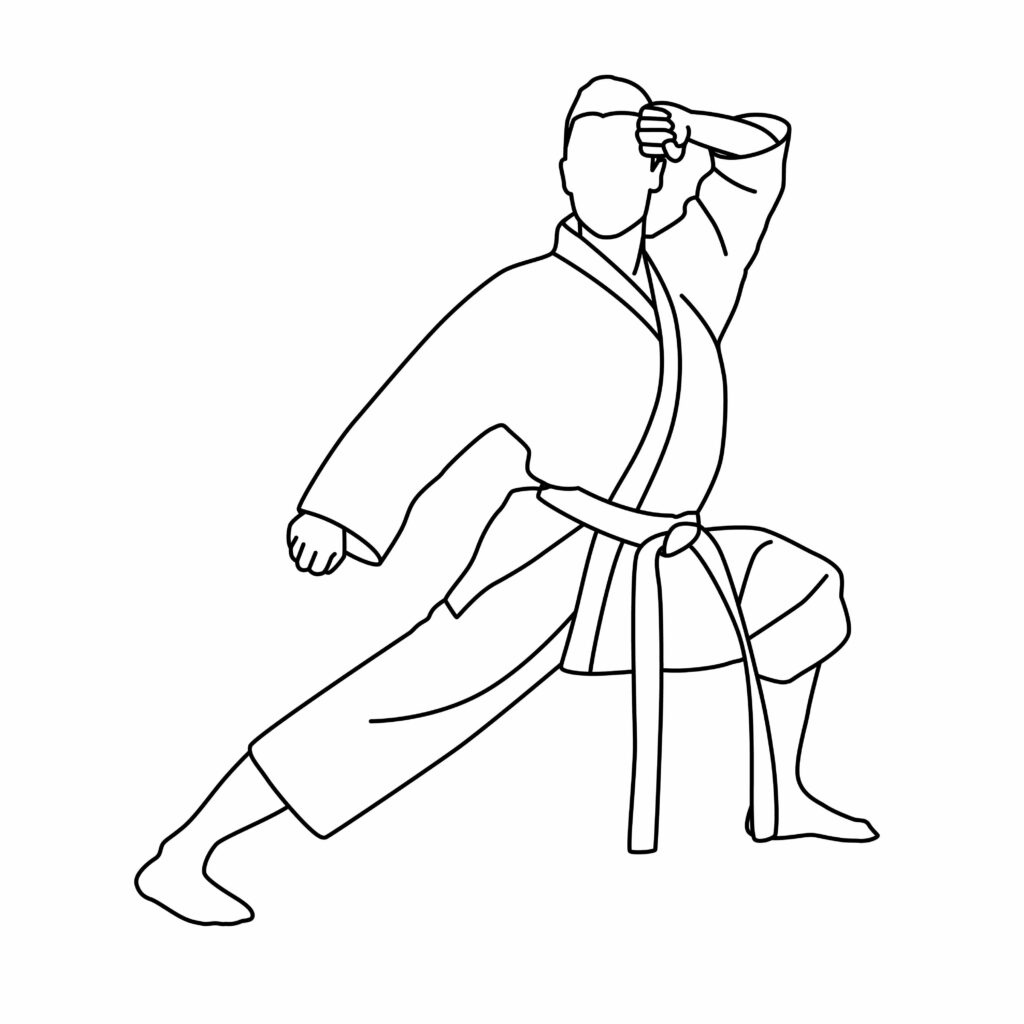
Congratulations! Your Karatist Drawing Is Complete
Taking Your Drawing to the Next Level
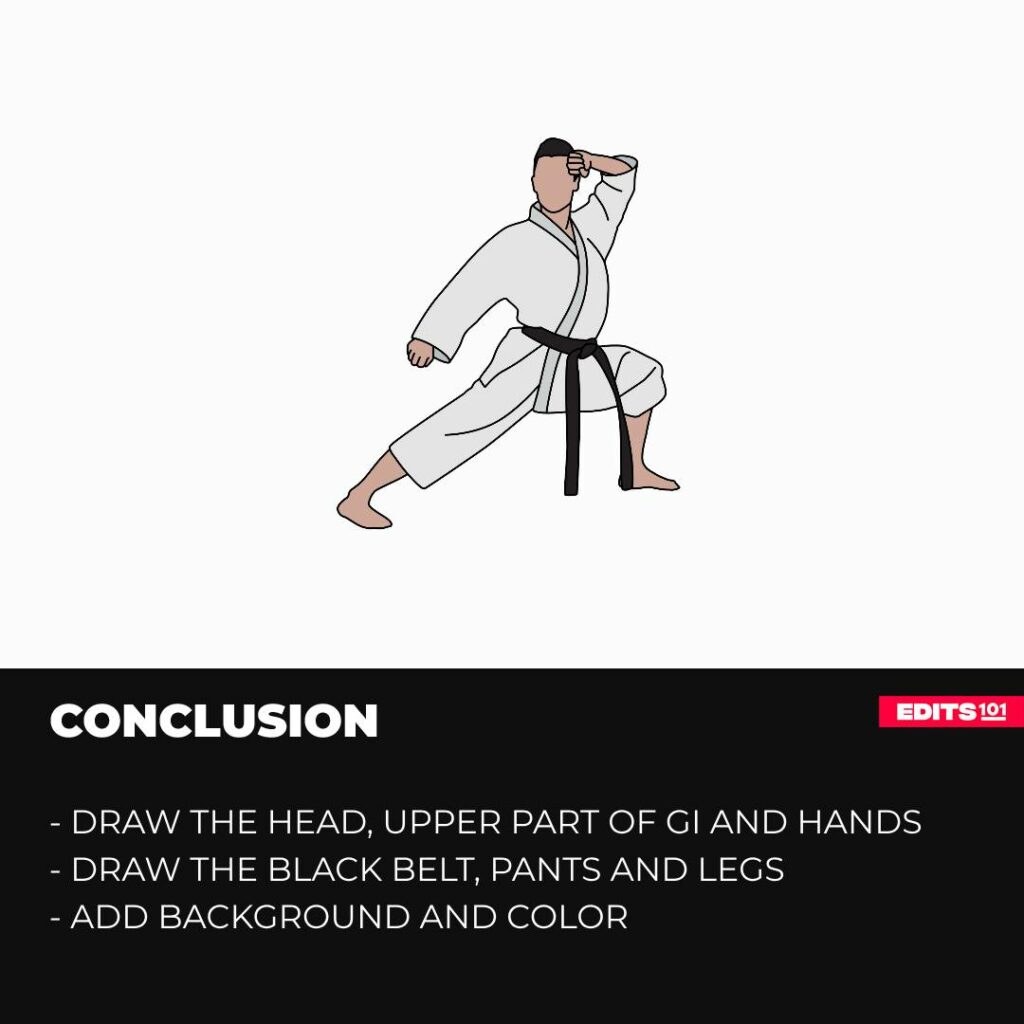
step 7: adding a Background
To give your karate master an awesome place to show off their moves, think about adding a background. Maybe they’re in a special karate school called a dojo, or surrounded by pretty cherry blossoms. You can even imagine them in a cool martial arts studio! Pick a background that makes your karate master look extra awesome.
step 8: adding Color
Time to make your karate master pop with colors! Try shading and blending – that means mixing colors to make them look cool. Add shadows to make your drawing look 3D, like the folds in the karate uniform or the muscles in the arms and legs. This step is all about making your karate master look even more powerful and ready for action.

Bonus Tips
Make your karate master even cooler by adding lines to show they’re moving super fast! Try giving them different faces to show how they feel during their awesome moves. Give your karate master the coolest hairstyle ever for some extra style points. Draw more karate masters doing different moves to create a super exciting scene. And remember, the most important thing is to have fun trying out different backgrounds and colors to make each drawing special and totally yours!
Conclusion
Congratulations, little artists, on completing your journey to draw a karate black belt master! Drawing this martial arts expert demands attention to detail and a love for capturing the spirit of karate. With patience and practice, you can become a true master of this artistic form, creating captivating illustrations that radiate the strength and discipline synonymous with karate.
So, don’t forget to grab your pencils, let your creativity flow, and continue on this exciting artistic adventure. With each stroke, you’re not just drawing a karate master; you’re expressing the power and beauty of martial arts on your very own canvas. Keep practicing, stay creative, and who knows maybe one day your drawings will inspire others to embark on their artistic journeys too.
Thanks for reading & feel free to check out more of our articles!